Create a data package
So, how do you create a data package once you get your authorization as subcurator? Since you’re authorized as subcurator you can find the button create dataset on the left side of the window (Figure 1). Click that button for the next step.
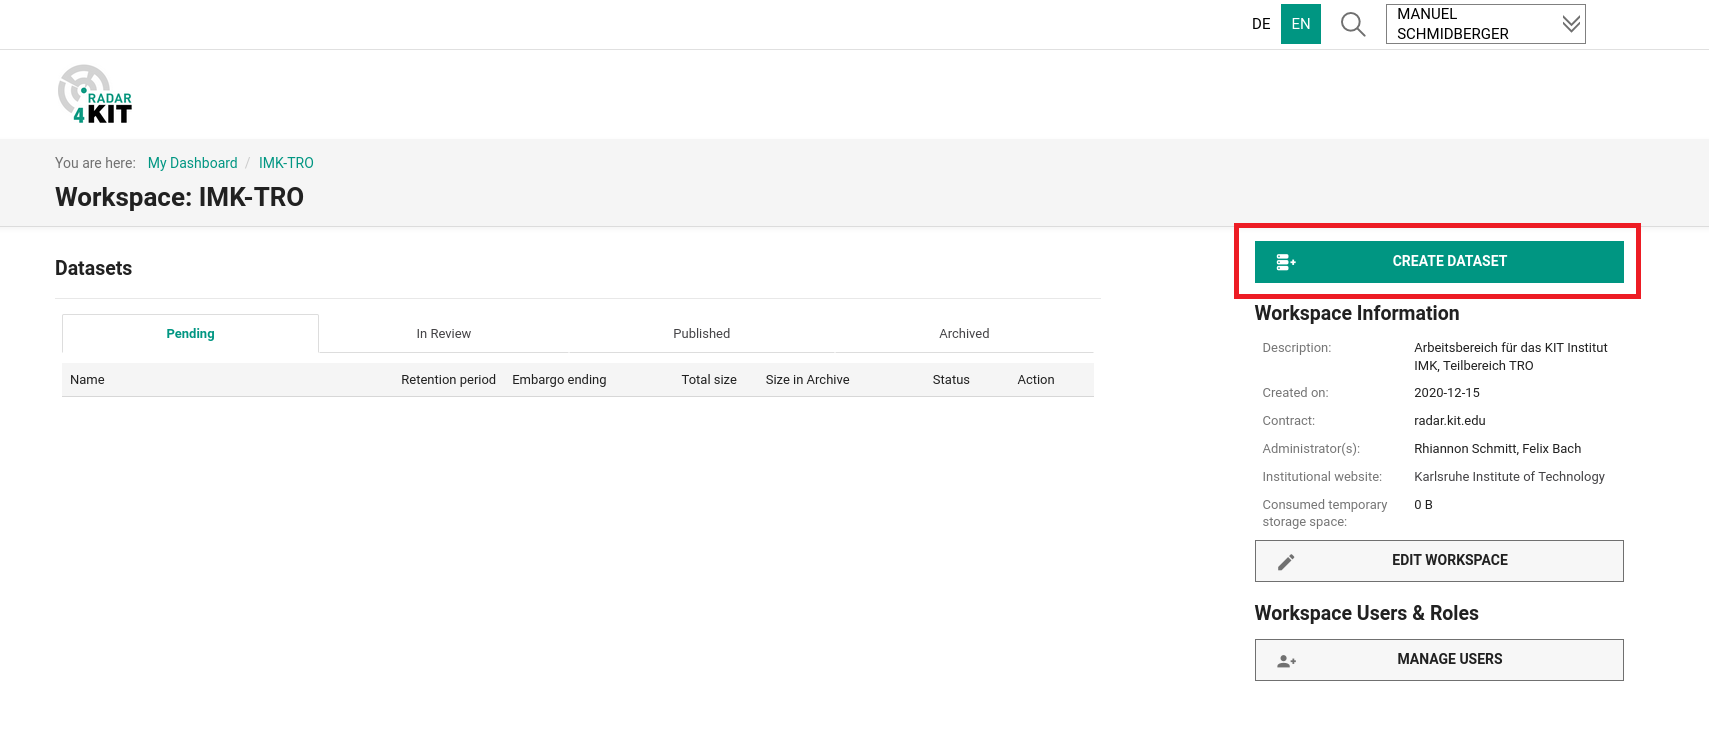
Fig. 1 Create dataset
You can choose between two options,
upload dataset (Figure 2.1) or
create empty dataset (Figure 2.2).
An empty dataset might be useful if you wanna reserve a DOI for a later time, but usually you’ll use option 1 if you already have your dataset available. In this case you can select your file (e.g. a single file or an archive like .zip, .tar, .tgz, .tar.gz., .tar.bz2) or drag-n-drop the file to the upload field.
Note
Your data should be formatted properly. Note that everyone who will use your data in future needs as much information as you can give for reusing the data. Therefore, you should define your data with proper metadata following well-known conventions (e.g. cf conventions etc.), a common file format (e.g. .nc, .h5, .csv), a proper naming (e.g. <modelname/campaign>_<device/sensor/version>_<variable>_<date/timerange>.<datatyp>) and some standards following the FAIR Data Principles. The more information you can share the more is the increases of value of your data set!
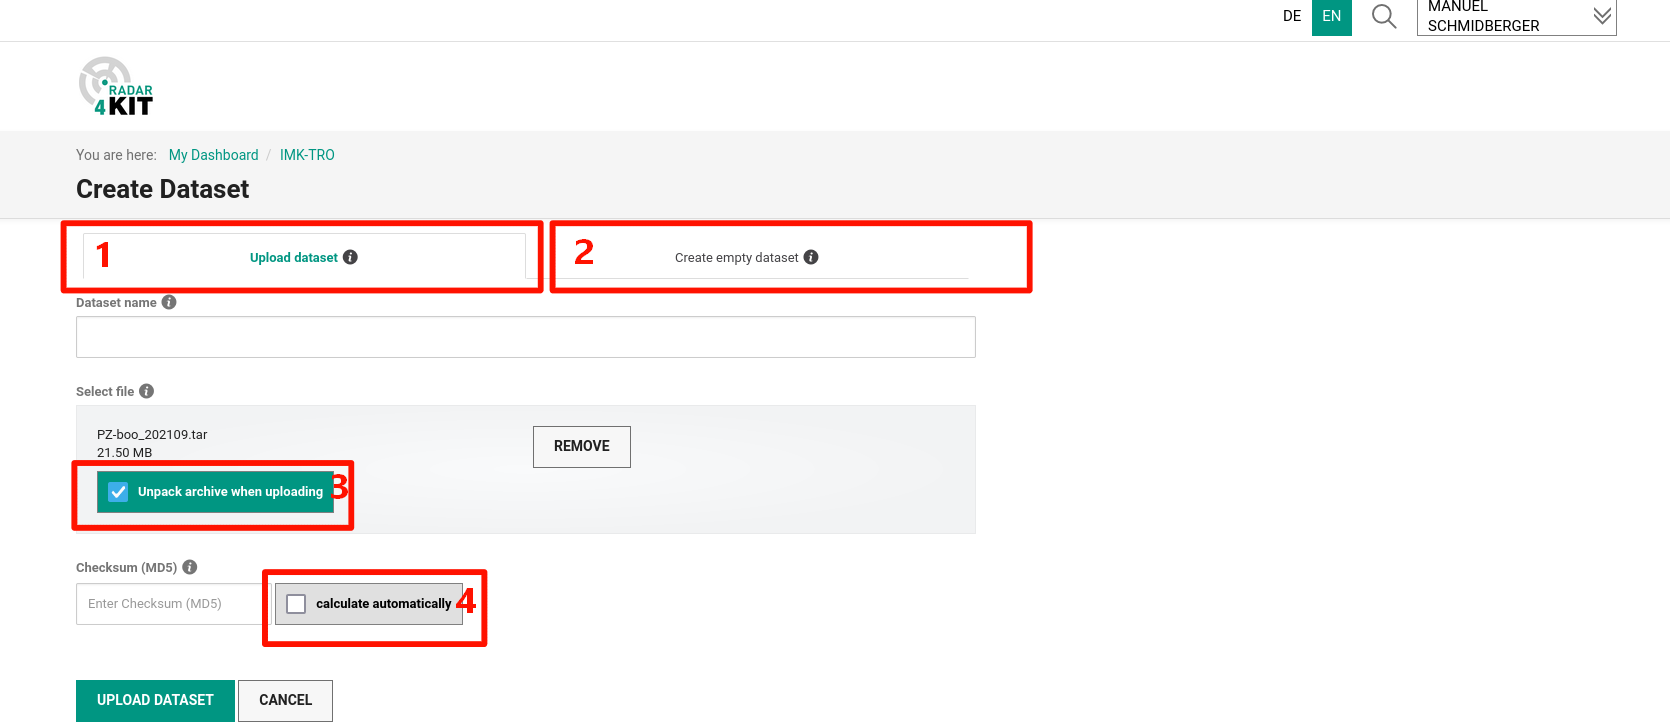
Fig. 2 Upload dataset
You can choose to optionally unpack the archive-files during the upload (Figure 2.3), the file directory structure remains unchanged. You can add individual files to the dataset later on while the dataset remains in status “pending”. This might be useful, if you need to change the dataset afterwards (e.g. after a reviewing process).
You can also choose the checksum option (Figure 2.4). Checksum is a MD5 hash value, representing the number of bits in a transmission message and is used to detect high-level errors within data transmission. Checksum is basically used to detect data corruption errors and verify overall data integrity. So if you haven’t calculated a checksum yet, you can choose calculate automatically for making sure, your dataset has not been accidentally altered or corrupted during the publishing process.
Danger
If you plan to upload several GBs of data, calculating the checksum via browser is NOT recommended since it will take a lot of time or even crash the hole upload process!

Fig. 3 Dataset overview
After uploading the files you get to the next screen. You can now browse your repository for metadata, content and technical metadata (Figure 3.1). The RADAR Metadata is most important to fill out (see next section). Any information about the data will be covered here later. The tab Content allows you to browse your uploaded dataset (Figure 4). If you’ve uploaded an archive and if you have not hit the “automatically unpack” box while uploading the file, you might see only a folder here. Clicking the folder will unpack the archive, and you can see all files inside your archive. You can add files here to the repository later while the status is pending by clicking the button in the top right corner (Figure 4). The tab Technical Metadata is just an information about the creator of the dataset and who was the last editing person.
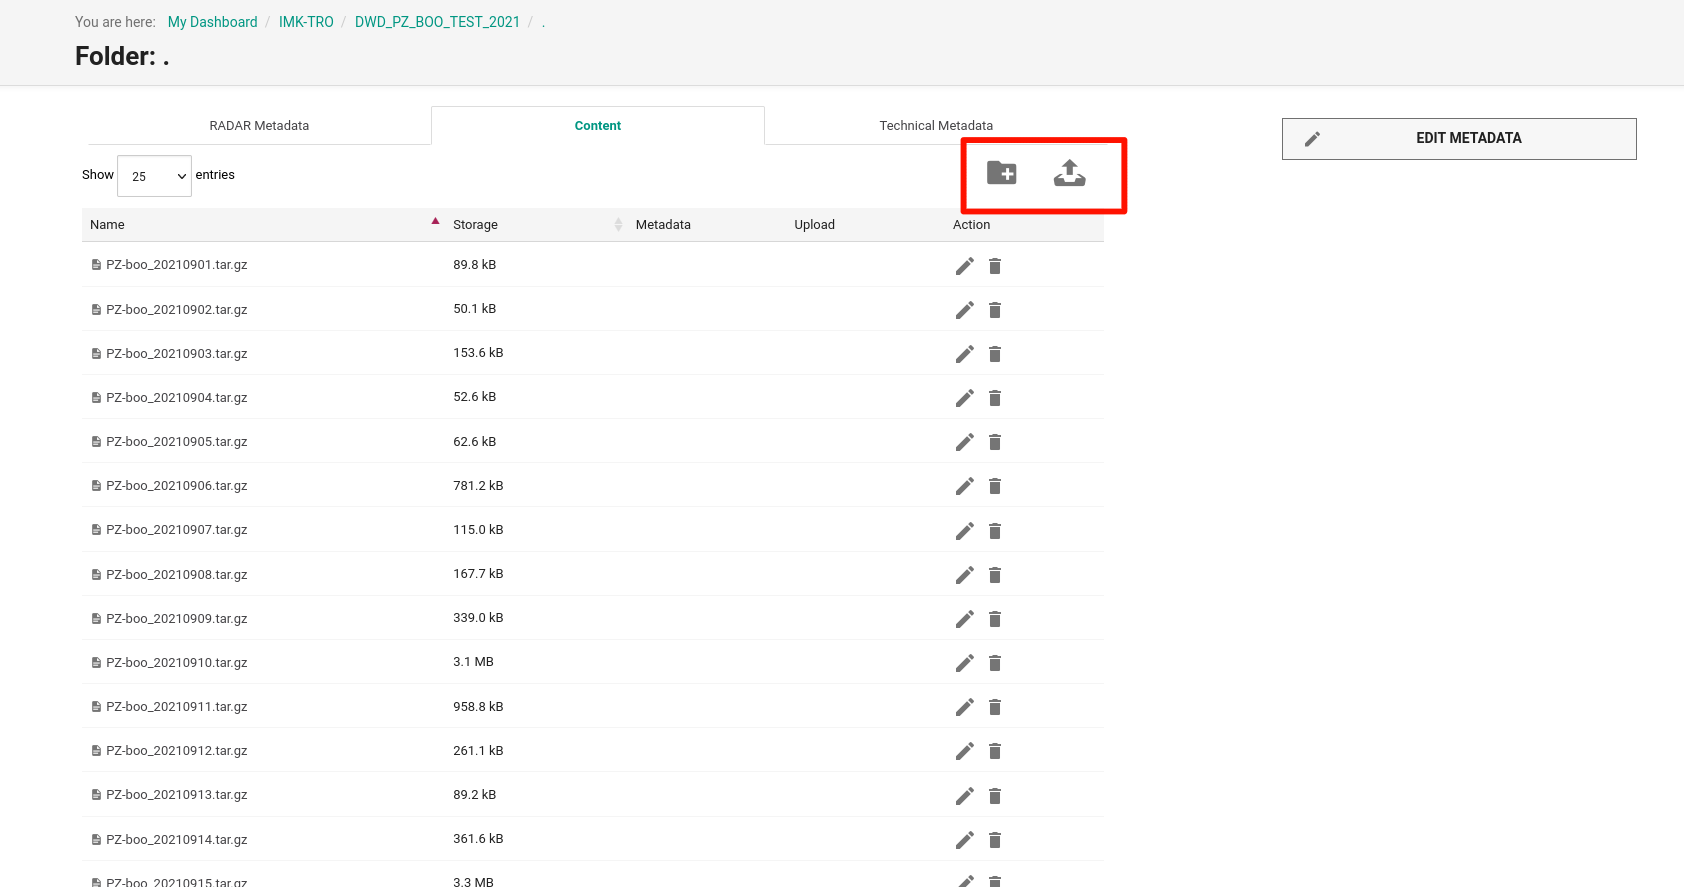
Fig. 4 Content of dataset